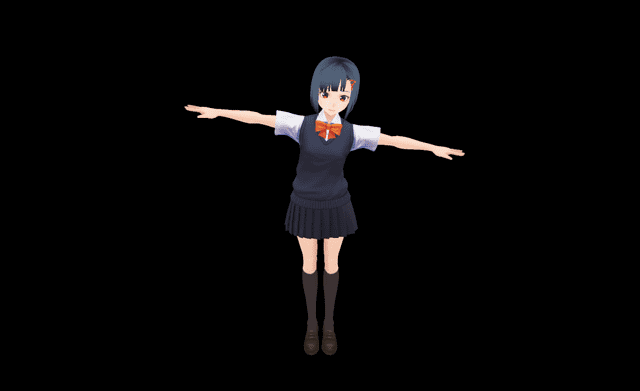
今回はVRoidStudioなどで出力できる、GLTFファイル(.gltf / .glb )を three.js で表示していきます。
GLTFは OpenGL等で有名なクロノスグループが策定している3Dファイル用の規格です。この分野は、現状 Autodesk 社の策定するFBX(.fbx)が主流ですが、GLTFはFBXに劣らないものになると思います。FBXは歴史が長いからこそ、逆に仕様がごちゃごちゃしていたりするので、 GLTF の方がまとまっていて気に入っています。
また、DRACO圧縮のような最新の圧縮技術によって、大幅にデータサイズを削減できるので、 データを毎回ダウンロードするthree.js に相性がいいです。
ソースコード
ファイル一覧
three.js で必要なファイルだけ読み込むようにしていますが、この辺はHTMLに書いたファイルパスを変えれば好きにしていただいていいです。
THREE.JS_SAMPLE
|- index.html
|- index.css
|- VRoid.glb
|-js
   |- index.js
   |- threejs
       |- GLTFLoader.js
       |- OrbitControls.js
       |- three.min.js
index.html
<!DOCTYPE html>
<html>
<head>
    <meta charset="UTF-8" />
    <link rel="stylesheet" href="index.css">
    <!-- three.jsを読み込む -->
    <script src="js/threejs/three.min.js"></script>
    <script src="js/threejs/GLTFLoader.js"></script>
    <script src="js/threejs/OrbitControls.js"></script>
    <!-- index.jsを読み込む -->
    <script src="js/index.js"></script>
</head>
<body>
    <div id="main_canvas">
        <canvas id="canvas" width="100%" height="100%"></canvas>
    </div>
</body>
</html>
index.css
@charset "UTF-8";
html {
    width: 100%;
    height: 100%;
    margin: 0;
    border: 0;
    padding: 0;
}
body {
    width : 100%;
    height : 100%;
    margin: 0;
    border: 0;
    padding: 0;
    overflow: hidden;
}
#main_canvas {
    width : 100%;
    height : 100%;
    margin: 0;
    padding: 0;
}
index.js
window.addEventListener('DOMContentLoaded', init);
function init() {
    // レンダラーを作成
    const renderer = new THREE.WebGLRenderer({
        canvas: document.querySelector('#canvas')
    });
    // ウィンドウサイズ設定
    width = document.getElementById('main_canvas').getBoundingClientRect().width;
    height = document.getElementById('main_canvas').getBoundingClientRect().height;
    renderer.setPixelRatio(1);
    renderer.setSize(width, height);
    console.log(window.devicePixelRatio);
    console.log(width+", "+height);

    // シーンを作成
    const scene = new THREE.Scene();

    // カメラを作成
    camera = new THREE.PerspectiveCamera(45, width / height, 1, 10000);
    camera.position.set(0, 400, -1000);

    const controls = new THREE.OrbitControls(camera);
    //camera.lookAt(new THREE.Vector3(0, 400, 0));

    // Load GLTF or GLB
    const loader = new THREE.GLTFLoader();
    const url = 'http://localhost/Three.js_sample/VRoid.glb';

    let model = null;
    loader.load(
        url,
        function ( gltf ){
            model = gltf.scene;
            model.name = "model_with_cloth";
            model.scale.set(400.0, 400.0, 400.0);
            model.position.set(0,-400,0);
            scene.add( gltf.scene );

            model["test"] = 100;
            console.log("model");
        },
        function ( error ) {
            console.log( 'An error happened' );
            console.log( error );
        }
    );
    renderer.gammaOutput = true;
    renderer.gammaFactor = 2.2;


    // 平行光源
    const light = new THREE.DirectionalLight(0xFFFFFF);
    light.intensity = 2; // 光の強さを倍に
    light.position.set(1, 1, 1);
    // シーンに追加
    scene.add(light);

    // 初回実行
    tick();
    function tick() {
        controls.update();

        scene.traverse(function(obj) {
            if(obj.name == "J_Bip_C_Chest"){
                obj.rotation.z += 2 /180*3.1415;
            }
        });
        if (model != null){
            console.log(model);
        }
        renderer.render(scene, camera);
        requestAnimationFrame(tick);
    }


    // 初期化のために実行
    onResize();
    // リサイズイベント発生時に実行
    window.addEventListener('resize', onResize);
    function onResize() {
        // サイズを取得
        width = document.getElementById('main_canvas').getBoundingClientRect().width;
        height = document.getElementById('main_canvas').getBoundingClientRect().height;

        // レンダラーのサイズを調整する
        renderer.setPixelRatio(window.devicePixelRatio);
        renderer.setSize(width, height);

        // カメラのアスペクト比を正す
        camera.aspect = width / height;
        camera.updateProjectionMatrix();
        console.log(width);
    }
}
index.html 解説
必要なjsファイルを読み込みます。
<!-- three.jsを読み込む -->
<script src="js/threejs/three.min.js"></script>
<script src="js/threejs/GLTFLoader.js"></script>
<script src="js/threejs/OrbitControls.js"></script>
<!-- index.jsを読み込む -->
<script src="js/index.js"></script>
canvas要素のwidthとheightをcssでなくHTMLで指定します。
css側でやってしまうと、ウィンドウのサイズを変更したときに、うまく描画内容のサイズが変更されません。
<div id="main_canvas">
    <canvas id="canvas" width="100%" height="100%"></canvas>
</div>
index.css 解説
canvas要素を囲むhtml, body, #main_canvas の高さと幅を常に100%にしています。
index.js 解説
レンダラーを作成します。
const renderer = new THREE.WebGLRenderer({
    canvas: document.querySelector('#canvas')
});
canvas要素を囲むdiv要素の幅と高さを取得します
width = document.getElementById('main_canvas').getBoundingClientRect().width;
height = document.getElementById('main_canvas').getBoundingClientRect().height;
解像度指定します。
renderer.setPixelRatio(1);
取得したウィンドウサイズを設定します。
renderer.setSize(width, height);
シーンとカメラを作成します。
カメラは THREE.OrbitControls を用いることで、マウスで視点を動かせます。
// シーンを作成
const scene = new THREE.Scene();
// カメラを作成
camera = new THREE.PerspectiveCamera(45, width / height, 1, 10000);
camera.position.set(0, 400, -1000);

const controls = new THREE.OrbitControls(camera);
THREE.OrbitControls を使わない場合は、注視点を指定します。
camera.lookAt(new THREE.Vector3(0, 400, 0));
GLTFファイルを読み込むためのLoaderを作成し、それを用いてモデルデータを読み込みます。
// Load GLTF or GLB
const loader = new THREE.GLTFLoader();
const url = 'http://localhost/Three.js_sample/VRoid.glb';

let model = null;
loader.load(
    url,
    function ( gltf ){
        model = gltf.scene;
        model.name = "model_with_cloth";
        model.scale.set(400.0, 400.0, 400.0);
        model.position.set(0,-400,0);
        scene.add( gltf.scene );

        model["test"] = 100;
        console.log("model");
    },
    function ( error ) {
        console.log( 'An error happened' );
        console.log( error );
    }
);
このままレンダリングを行うと暗くなってしまうので、ガンマ補正を行います。
renderer.gammaOutput = true;
renderer.gammaFactor = 2.2;
光源を作成し、シーンに追加します。
// 平行光源
const light = new THREE.DirectionalLight(0xFFFFFF);
light.intensity = 2; // 光の強さを倍に
light.position.set(1, 1, 1);
// シーンに追加
scene.add(light);
レンダリングループはこんな感じで書きます。
controls.updateはTHREE.OrbitControlsを使ってなければいりません。
tick();
function tick() {
    controls.update();

    // ここに処理を書く

    renderer.render(scene, camera);
    requestAnimationFrame(tick);
}
モデルの要素にアクセスするには scene.traverseを使うといいようです。
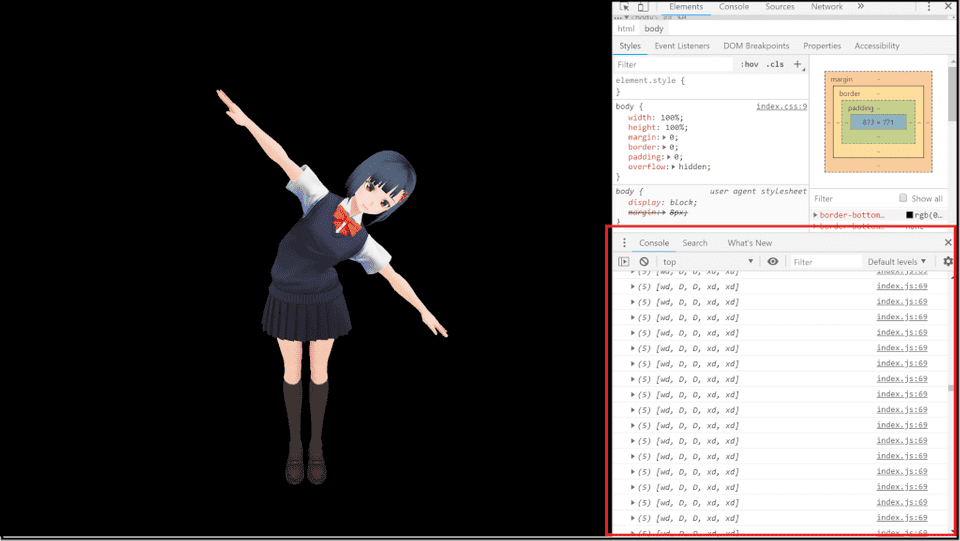
ボーンを回転させようとするならこんな感じです。 腰がねじ切れるように回ります(笑)
scene.traverse(function(obj) {
    if(obj.name == "J_Bip_C_Chest"){
        obj.rotation.z += 2 /180*3.1415;
    }
});
tick() { }の中でモデルを読み込んだ要素にアクセスする注意点ですが、ファイルの読み込みは非同期で行われていることです。
loader.load( )を呼び出した直後にはまだ、読み込みが完了していません。 他のコードを実行している間に、読み込みを行います。
何も考えずに
function tick() {
    controls.update();

    console.log(model.children);

    renderer.render(scene, camera);
    requestAnimationFrame(tick);
}
としてしまうと、まだ読み込みが完了しておらず、modelに値が入ってないので、modelの要素には当然アクセスできずエラーになります。
Uncaught TypeError: Cannot read property 'children' of null
modelのnull判定をしてあげるといいと思います。
function tick() {
    controls.update();

    if (model != null){
        console.log(model.children);
    }
    renderer.render(scene, camera);
    requestAnimationFrame(tick);
}
リサイズ処理です。
// 初期化のために実行
onResize();
// リサイズイベント発生時に実行
window.addEventListener('resize', onResize);
function onResize() {
    // サイズを取得
    width = document.getElementById('main_canvas').getBoundingClientRect().width;
    height = document.getElementById('main_canvas').getBoundingClientRect().height;

    // レンダラーのサイズを調整する
    renderer.setPixelRatio(window.devicePixelRatio);
    renderer.setSize(width, height);
    // カメラのアスペクト比を正す
    camera.aspect = width / height;
    camera.updateProjectionMatrix();
    console.log(width);
}
こんな感じに描画されます。
読み込んだデータの確認方法
「Ctrl+Shift+I」で開発者ツールを表示します。
if (model != null){
     console.log(model);
}
みたいに出力すると、コンソールに表示してくれます。


